DROPZONE Tier List Hub
Current-meta rankings for weapons and loadouts in Solo, Duo, and Squad.
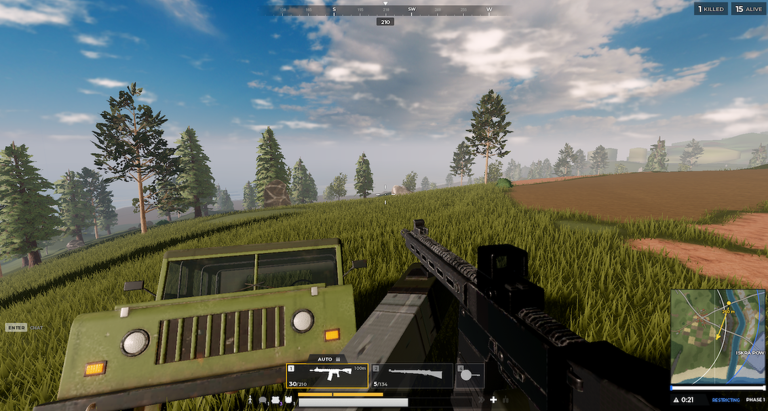
Welcome to the DROPZONE tier list hub. DROPZONE is a Roblox battle royale beta from Dropzone Battle Royale: up to 100 players per match, Solo / Duo / Squad, and both TPP and FPP. This hub explains how we rank gear for the current meta, then points you to the detailed child lists.
If you are brand new, skim Getting Started first, then come back here when you want a clear picture of what to pick up and what to leave behind. For win-condition habits after you understand the ranks, see How to Win. Fresh drop destinations that feed strong kits are covered on Landing Spots.
Child pages on this hub
- Weapons Tier List — S–A–B–C rankings for assault rifles, SMGs, and snipers, with notes on attachments and when each gun shines.
- Loadouts — practical builds for close-range rush, mid-range AR fights, sniper support, and squad role splits, including armor and utility.
Use the weapons page when you are deciding between two floor guns. Use the loadouts page when you are planning a full kit before the circle collapses.
Ranking criteria we use
Every placement on these lists is a trade-off, not a fashion contest. We weight five factors that matter in DROPZONE lobbies:
- TTK (time to kill) — How fast a clean spray or burst removes a same-level armored target. Lower TTK wins most mid-fight peeks if you track well.
- Effective range — Where the gun stays accurate enough to land shots before bloom or drop-off wastes ammo. ARs carry mid, SMGs own buildings, bolt rifles punish across KOBALT’s open cuts.
- Recoil and controllability — Vertical kick, horizontal sway, and how forgiving the gun is while moving or ADS from vehicles. Controllable guns climb tiers because average players land more shots.
- Ammo economy and availability — Common calibers and magazines you can restock after hot drops beat rare ammo that strands you in late circles.
- Mid-game versus endgame value — Early loot that helps you survive the first two circles can still lose value when third-party fights and Level 3 armor dominate. Endgame picks must win cramped final circles or hold long angles on KOBALT (2.4 km) and AKANE (2.0 km).
We also note attachment synergy: red-dot and holo for close, 2x–15x for reach, plus grips, suppressors, and stocks that stabilize or silence your kit. Armor (helmets, vests, backpacks Levels 1–3), medkits, boosts, grenades, molotovs, and even the frying pan change how greedy you can be with a loadout.
How to read S–A–B–C
- S — Take these whenever the fight plan matches. They win fair fights and forgive small aim errors.
- A — Excellent with the right optic and range. Slightly more situational than S, still first-pick for many roles.
- B — Playable and common. Strong if you already have armor and positioning; swap when a true upgrade appears.
- C — Emergency or niche. Use to bridge to a better gun; do not force them into endgame if alternatives exist.
Patch context matters. Version 2.7 increased loot spawns and fixed hitbox / ADS issues around vehicles, which means more contested POIs and cleaner vehicle peeks. Rankings assume that denser loot and those vehicle feel fixes are live. When balance shifts, we revise the child pages first, then update this hub summary.
Mid-game and endgame mindset
Mid-game (after the first rotation) favors versatile ARs such as AKM, HK416, and SCAR-L with a red-dot or low zoom, plus an SMG like Vector or UMP45 for buildings. Endgame favors either a laser AR with grip and stock for spray transfers, or a dedicated sniper line (Kar98k, M24, AWM) with a DMR backup like Mk14 for follow-up shots. Squads should assign roles so one player holds long angles while others clear compounds—see the loadouts page for role kits.
Vehicles (cars, motorcycles, boats) change tier value too: suppressors and stable ADS matter more when you shoot from or at moving targets after the 2.7 ADS vehicle fixes. Always pair a ranked primary with Level 2+ armor when you can; Level 3 sets swing fights harder than a one-tier gun upgrade.
Related wiki links
- Practice fundamentals in Guides and Getting Started.
- Tune aim and camera on Controls and the Tools settings checklist.
- Claim rewards via Codes, track patches on Updates, and review utility notes on Scripts if you use client helpers safely.
Bookmark this hub, then open Weapons or Loadouts before your next queue. Rankings are a guide—positioning, third parties, and circle luck still decide chicken dinners.
Frequently Asked Questions
Quick answers to the most common DROPZONE questions.
How is the DROPZONE tier list ranked?
We rank by TTK, effective range, recoil control, ammo economy, and mid-game versus endgame value, then adjust for attachment synergy and armor level. Patch notes such as V2.7 loot and vehicle ADS fixes can move guns between tiers.
Should I always take S-tier weapons?
Prefer S-tier when the fight distance matches the gun. An S-tier sniper is wrong inside a tight compound; an S-tier SMG is wrong across open KOBALT fields. Match the tier pick to range and your squad role.
Where do loadouts fit versus the weapons list?
The weapons page ranks individual guns. The loadouts page assembles full kits—primary, secondary, armor Levels 1–3, meds, boosts, and utility—for rush, mid-range, sniper support, and squad roles.
Do Solo, Duo, and Squad share the same tiers?
Gun tiers are mostly shared, but squads value support snipers and utility more, while Solo leans on versatile ARs and self-revive economy. Check both child pages and adapt to your mode.